> For the complete documentation index, see [llms.txt](https://support.senterasensors.com/home/llms.txt). Markdown versions of documentation pages are available by appending `.md` to page URLs; this page is available as [Markdown](https://support.senterasensors.com/home/rtk-ppk-module/setup-and-installation/ntrip-cors-vrs/laptop-ntrip-client.md).
# Laptop NTRIP Client
## NTRIP Client
This NTRIP client allows for the connection to CORs/VRS networks.
This client also allows for the routing of RTCM data from Serial, UDP, Bluetooth and other such corrections source types to the Sentera ground radio output. This allows for integration of many other correction sources/base stations.
***
## Download
{% embed url="" %}
***
## NTRIP Client Setup
{% stepper %}
{% step %}
### Download & Unzip
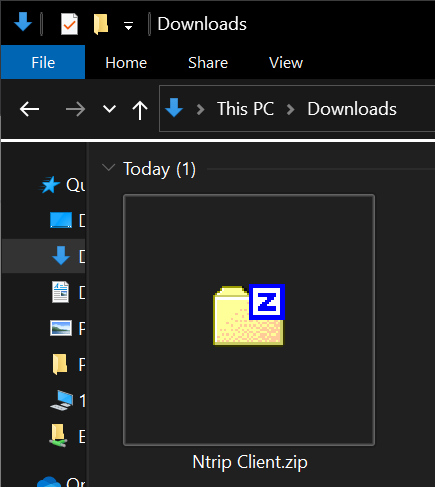
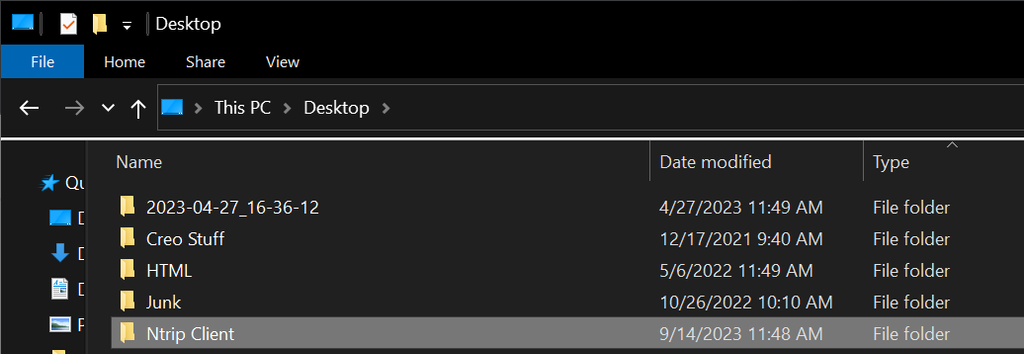
Download the NTRIP Client and unzip it to a location that can be used when needed.
{% endstep %}
{% step %}
### Open Ntrip Client Folder
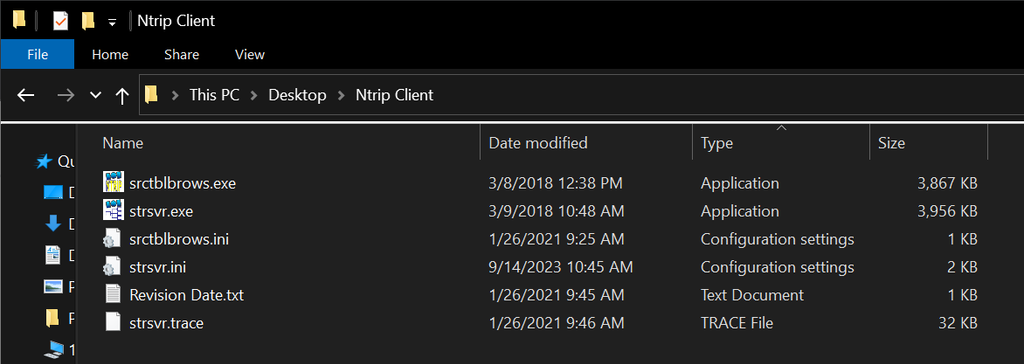
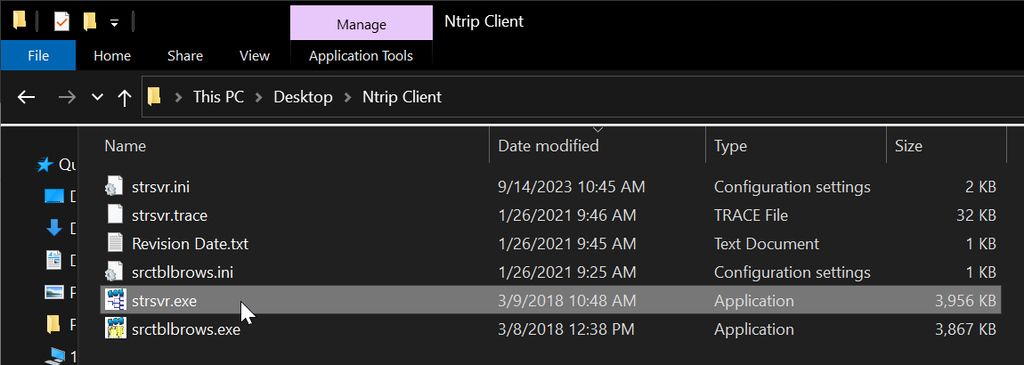
Open the Ntrip Client folder and a list of files should be located inside.
{% endstep %}
{% step %}
### Run strsvr.exe
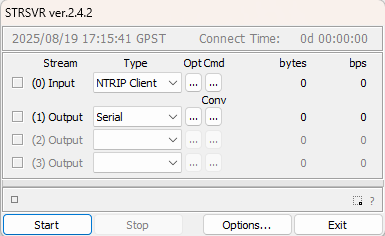
Double click on strsvr.exe to launch the NTRIP client.
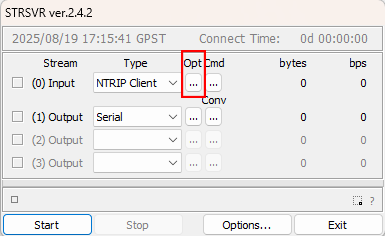
A small window should appear.
{% endstep %}
{% step %}
### Setup Corrections Network
{% hint style="info" %}
For first time set up or if the network provider is changing the following steps must be completed.
{% endhint %}
Select the “Opt” button as shown.
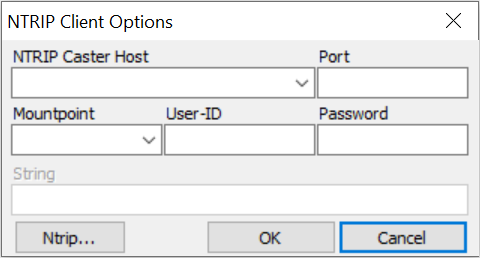
The NTRIP Client Options window will appear. This is where the network and account information will be input.
{% endstep %}
{% step %}
### Set Caster Host & Port
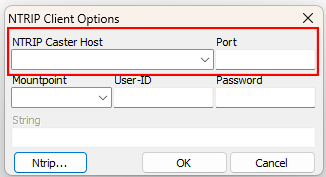
The Caster host address and Port will be provided by the network you are using. This information should be given after account registration is complete.
{% endstep %}
{% step %}
### Set the Mount Point
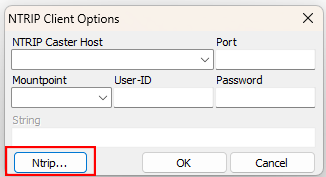
A mount point must be set. Select the Ntrip button in the lower left corner as shown
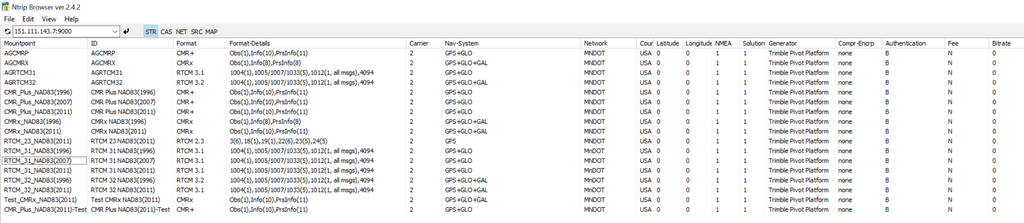
A list of available mountpoints from the host network will appear in a pop up window.
Select an appropriate mountpoint. The RTK-PPK uses RTCMv3 messages. Most RTCMv3 or greater mountpoints should be compatible.
{% hint style="info" %}
Ensure the Datum reference of the selected mount point meets the end use case of your data.
{% endhint %}
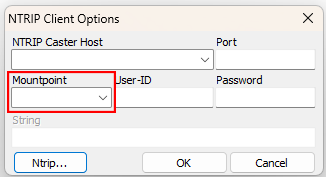
Copy the name of the selected mountpoint from the list and paste it into the Mountpoint box in the NTRIP Client Options window.
{% endstep %}
{% step %}
### Enter Login Credentials
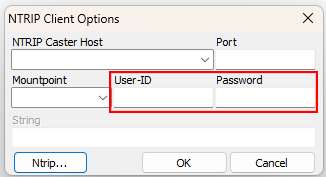
Enter your login and password information, then press OK.
{% endstep %}
{% step %}
### Configure Output
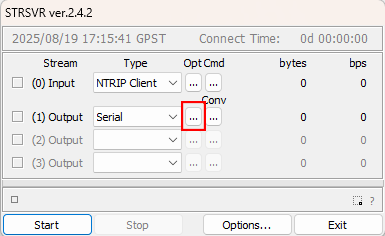
In the Output row, press the Opt button next to the drop down
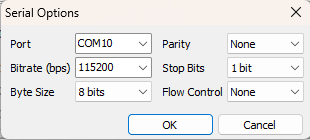
A pop-up menu will appear
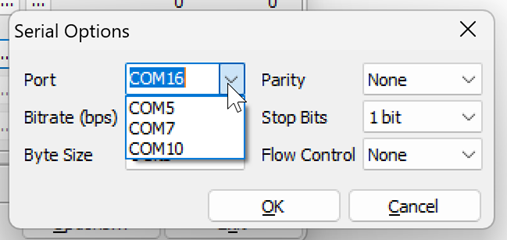
Select the Port drop down menu and select the COM port that is associated with the ground radio. **Please see the note below on how to determine the correct COM port.**
{% hint style="info" %}
To determine the COM port that is associated with the ground radio do the following:
1. Open the Opt menu as shown above.
2. Select the Port drop down menu.
3. Note the available COM ports.
4. Press the cancel button.
5. Connect the radio to the computer via USB.
6. Open the Opt menu agian.
7. Select the Port drop down menu.
8. Select the new COM device that was not initially shown.
{% endhint %}
Then press okay.
{% endstep %}
{% step %}
### Setup Complete!
{% endstep %}
{% endstepper %}
---
# Agent Instructions
This documentation is published with GitBook. GitBook is the documentation platform designed so that both humans and AI agents can read, navigate, and reason over technical content effectively. Learn more at gitbook.com.
## Querying This Documentation
If you need additional information that is not directly available in this page, you can query the documentation by asking a question.
Perform an HTTP GET request on the following URL with the `ask` and `goal` query parameters:
```
GET https://support.senterasensors.com/home/rtk-ppk-module/setup-and-installation/ntrip-cors-vrs/laptop-ntrip-client.md?ask=&goal=
```
`ask` is the immediate question: it should be specific, self-contained, and written in natural language.
`goal` is what the user is ultimately trying to achieve, the reason they need the answer. Sharing it helps GitBook give you a better, more relevant answer. A goal is most helpful when it describes the outcome the user wants rather than restating the question. For example, with `ask=how do I create an API token`, a goal like `automate deployments from our CI pipeline` lets GitBook tailor the answer to that use case.
The response will contain a direct answer to the question and relevant excerpts and sources from the documentation.
Use this mechanism when the answer is not explicitly present in the current page, you need clarification or additional context, or you want to retrieve related documentation sections.